Wednesday, September 27, 2017

Pumpkin Spice Syrup

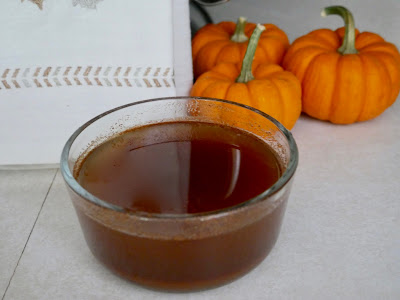
Is there anything better than pumpkin spice? Specifically, pumpkin spice lattes from Starbucks? I don’t think so! Today I am sharing a pumpkin spice syrup that can recreate the PSL at a fraction of the cost. I love treating myself to Starbucks sometimes, but I couldn’t do it everyday. Do you know how much money I would be spending in coffee if I went there daily?! Personally, I’d rather spend the money on something I really need; like shoes. Because shoes are a need, right? Right. Now someone tell my husband that. I think if I come home with another pair of shoes, he might lose his mind. LOL.


Back to the pumpkin spice. I had all the ingredients for this syrup stocked in my pantry, and I bet you do too! This syrup is so simple to make and takes less than 15 minutes to make. I whipped up a batch Sunday morning while prepping other things for my week. This syrup can be used on pancakes, ice cream, cookies; basically anything you want to add a little pumpkin spice to. It made about a cup and half of liquid, which I stored in a pyrex container and should last me all week. 


For this post, I decided to make something similar to a frappuccino blended coffee. My sweet aunt sent this recipe over to me and I knew I had to try it. All you need is ¼ cup of the pumpkin spice syrup, 1 cup of coffee, ¼ cup of milk (I used coconut milk) and 1 ½ cups of ice. I blended this up in my blender and voila! This made a lot - so much that I spilled it all over my counter. I suggest using a good sized tumbler or tall glass for this. I ended up throwing half of mine out, because clearly I couldn’t save what spilled (oops!).
 

If you’re a pumpkin lover, like me, this is something you must try. Happy (fall) eating!


print recipe

Pumpkin Spice Syrup
Ingredients
  • 1 1/2 cups water
  • 1 1/2 cups sugar
  • 2 tsps cinnamon
  • 1/2 tsp ground cloves
  • 1 tsp ground nutmeg
  • 1/2 tsp ground ginger
  • 2 tbsps pumpkin puree
Instructions
1. Heat water and sugar in small sauce pan. Stir occasionally until sugar is dissolved. 2. Add the spices and pumpkin. Let simmer on medium heat for 8 minutes stirring frequently. 3. Strain through fine strainer or cheese cloth at least two times. 4. Let cool and store in glass container for up to a week in the fridge.
Details
Prep time: Cook time: Total time: Yield:
Monday, September 25, 2017

Fall Nail Colors

baby's breath・always connected・miss fancy pants・after school boy blazer

Fall is in full swing here in the Ferrando house. We are loaded with pumpkins, mums, all the fall decor and of course fall inspired food. This week on the blog I am posting all fall themed posts. Today I’m sharing some of my favorite nail colors as we transition into the cooler weather. These four colors have been on repeat for me lately. I like to paint my nails once a week and I have been really trying to stick with it. Painted nails look so classy and keeps you looking like you have it all together. 


I love having painted nails but I hate that it can chip so easily. I was on the hunt for a good top coat and so I invested in two different Essie products. The first is this fast setter top coat. It is amazing! I can paint my nails at 8pm, go to bed two hours later and not wake up with sheet imprints. In the past I could never paint my nails in the evening because without fail I would wake up with lines all over my nails from the blankets. I find there is no “good” time to paint my nails because I am constantly doing things around the house. Evenings are the only time I can sit and wait for my nails to dry. I highly suggest this topcoat!

Currently I am obsessing over our Christmas card picture. I know Christmas seems so far away but when you want a picture, it needs to be planned early on. My friend Leah and I are really like two peas in a pod, and so it’s only fitting that she too is obsessing over the perfect picture. We have been talking about what we’re going to wear-- and what our husbands will be wearing-- for the past week! Anyone else style their husbands without consent? LOL. Stay beautiful!

Friday, September 22, 2017

Paleo Breakfast Sandwich

I don’t know about you, but I love having a hot breakfast. Typically my breakfasts are on the go or eaten while sitting at my desk checking my emails. I need something that travels well and that is easy to eat. I’ve shared some breakfast ideas in this post but today I’m sharing a breakfast sandwich that you can prep ahead and make a week's worth of.

This paleo sandwich I found on Paleomg blog. First of all, if you don’t follow Juli you definitely should. Even if you don’t typically read blogs, follow her on instagram. She posts about delicious food and her instagram stories are so real and uncensored. I laugh out loud everytime I watch her stories and I am inspired by her healthy lifestyle! Go check her out!

Back to the sandwich. I found Juli’s recipe here and I pretty much followed the recipe as it was. This sandwich is two pancakes with scrambled eggs and sausage in between it. Did I mention it is topped with a pat of butter and drizzled with maple syrup? I was so excited about these little sandwiches that I could hardly wait until morning to try them. Since Juli’s recipes are paleo, I didn’t find a need to change the recipe much. The only thing I didn’t do was make homemade sausage because I didn’t have all the ingredients and honestly it seemed like a pain. Is it ok that I said that? LOL. I decided to buy frozen patties with the least amount of ingredients. Here are some tips for making these delicious breakfast sandwiches.

The pancake batter should be thick. Don’t add too much coconut milk to the batter even though it looks thick. The batter will be a little thick because of the coconut flour. It is very absorbent but if you put too much milk it will leave your pancakes much too thin and runny. Be sure to keep a close eye when cooking the pancakes because they won’t bubble as much as a regular pancake would. I turn mine at about the 3-4 minute mark and they were perfectly golden.

Use one egg per sandwich. Although the original recipe yields 6 sandwiches, mine only yielded 4. Now, I may have made my pancakes a little bigger than the 3 inch diameter that was instructed (oops!) but not to worry! Depending on the number of pancakes you make, base that on the number of eggs you’ll make next. My batter made 8 pancakes, so I knew I would have four sandwiches. I ended up making 6 eggs and it was a little bit much for the tiny sandwiches.

Wrap in tinfoil. I topped my sandwich with butter and syrup and then wrapped it up in tinfoil. It has been so easy to quickly unwrap it, pop it in the microwave for 1 minute, and then enjoy it! Make sure that the tinfoil wraps all the way around the sandwich so you don’t have any syrup leakage in the fridge!

Do not make on an empty stomach. If I hadn’t just eaten dinner prior to making these, I would’ve eaten one or two. These smell amazing when cooking them and they look even better when they are put together and topped with butter and syrup. If you want them to last until breakfast, eat before you prep!

This may seem tedious for a breakfast but it is so much easier to grab and go in the morning. These sandwiches maybe took 20 minutes to put together and now it takes me two minutes to get my breakfast ready during the week. I hope you enjoy these scrumptious breakfast sandwiches. I know I have been loving them for breakfast!
 
Recipe can be found here. Happy eating!

Wednesday, September 20, 2017

Foundation Favorites

I don’t switch up my foundations too often, and therefore I haven’t tried that many. Once I find a foundation that I like I tend to use it for a while. I’ve rounded up four of my all time favorite foundations and I’m telling you why I love them!

First is the Maybelline Fit Me Dewy + Smooth foundation. This is a recent purchase for me but I have been loving it! I’ve been wearing it for about 2 weeks and it lasts all day. The past two weeks I have been in a hot and humid classroom and even though I come home extra shiney, my foundation is still in place and flawless. I find that with this foundation a beauty blender works best and a little goes a long way. If I’m being honest I only bought this because I had a coupon, and boy am I glad I did. I highly recommend it if you’re looking for a dewy finish, long wear and light to medium coverage.

Another great foundation that I have raved about on the blog many times if the L’Oreal Infallible Pro- Glow Foundation. This stuff will give you a glow like no other! It blends so nicely with a foundation brush and a beauty blender. Some days I would wear this alone with a little blush and mascara and still feel pulled together. This summer I was loving the all over glow look and this combined with a highlighter- so good! There is also a matte version, which I think I might get for the winter months.

Next is the It Cosmetics CC Cream with SPF 50. I know this is called a CC cream but it is comparable to a medium coverage foundation. I wore this foundation for a while and repurchased it twice. What I love about this is that it is so lightweight but really provides a flawless coverage. My skin looked so smooth and I loved the fact that it had an SPF in it. The only negative to this was that the color didn’t match my skin well because I was in between shades.

Another foundation, that’s not really a foundation, is the Bareminerals Complexion Rescue Tinted Hydrating Gel Cream. I love using this as a very light coverage foundation for days when I just want to put something on and run out the door. I used this in college and have recently repurchased it. Like it’s name, it is very hydrating and is a life saver if you have dry skin. It does feel like a moisturizer and therefore powders stick well to this cream.

What are your favorite foundations? Stay beautiful!

Monday, September 18, 2017

Chicken Taco Salad + Cilantro Lime Dressing

It’s been a hot minute - I know! These past two weeks have been a big adjustment period as I get back into my work routine. I’ve been finding I’m so exhausted when I get home from work that all I want to do is eat and snuggle with my hubby. I finally feel like I am getting used to being on my feet all day and have built enough stamina to come home, make dinner, work out (if I’m lucky), and write a post. Towards the end of my school year last year, I was waking up early to work out. Hopefully I can slowly get myself back to that routine! I’m really really trying to make this work because I’ve missed writing these past two weeks!

Today I am sharing this flavorful chicken taco salad. It has the same flavors as a taco, but I honestly think it tastes so much better and it’s better for your waistline! I don’t miss the greasy beef or the soft taco one bit! The key to making this salad desirable, is the seasoning on the chicken and the dressing. I am obsessed with this dressing. After I made it, I used it for the rest of the week on my wraps for lunch. It would also be really good with vegetables or pita chips- yum!
I found the original recipe here but, as always, I put my own twist on it and added and subtracted flavors to my liking. I love this salad because it is super quick to put together and very satisfying. Sometimes after I eat a salad I still feel hungry or an hour later I am starving but not with this recipe! The chicken mixed with the greens and vegetables create a beautiful dish that keeps you satisfied. I added diced tomatoes, avocado, and mozzarella to my bed of greens and topped it with the chicken and cilantro-lime dressing.

I’ve made this salad twice in the last two weeks, it’s that good! If you try it, let me know! Happy eating!


print recipe


Chicken Taco Salad
by September-18-2017
Ingredients
  • 1 bag lettuce
  • 2 seeded and diced tomatoes
  • 1 pitted and cubed avocado
  • 1/4 cup shredded mozzarella cheese
  • 1 pound chicken breast
  • 2 tbsps (divided) taco seasoning
  • 1/4 cup finely chopped cilantro
  • 1/2 cup mayo
  • 1/4 cup plain greek yogurt
  • 3-4 tbsps lime juice
  • 1/2 tsp (optional) sugar
Instructions
1. Cut chicken into bite sized pieces. Season with one tablespoon of the taco seasoning. Cook in skillet until chicken is cooked through. Set aside. 2. While chicken is cooking assemble the salad. In a large bowl add lettuce, diced tomatoes, avocado, and cheese. For the dressing:1. In a small bowl mix the mayo with the greek yogurt. 2. Roughly chop the cilantro leaves and fold them into the yogurt mixture. 3. Add the lime juice, one tablespoon of taco seasoning and sugar (if using). 4. Top salad with dressing and chicken- voila!
Details
Prep time: Cook time: Total time: Yield: 2 servings

Wednesday, September 6, 2017

Chickpea Salad + Avocado Cilantro Dressing

I try to write my posts a day or two in advance so as I’m writing this I am recovering from my first day of school. LOL. It was so much fun but I am exhausted. I love how excited and eager the kids are on the first day and I am looking forward to a fresh start and a great year. Another thing I am looking forward to is the weekend, too soon? How is it only Wednesday?! Weekends are great for gathering with family and, while the warm weather lasts, having cookouts. I made this delicious chickpea salad this past weekend for a Labor Day party and it was quite the success.

Chickpeas are a funny legume. They are hearty but small and pack a subtle but distinct flavor. Because chickpeas are so meaty they are great to throw in a salad or in this case, become the base of the salad. For this recipe the ingredients are minimal and putting this salad together is almost fool proof. If you are a chickpea lover this recipe is for you. If you are unsure about using chickpeas as a salad, I encourage you to go ahead and try it. Be a daredevil, you!
I based my recipe off of this one. I changed the ingredients quite a bit but mainly because I didn’t have all of the ingredients it required. Regardless, this chickpea salad turned out delicious and was quite filling. Here are some tips to follow when making this salad.
Rinse chickpeas well
I used two cans of chickpeas for this salad and it is imperative that you rinse them well. I pour mine right into a colander and rinse thoroughly with water. If you don’t rinse them they will have an oily texture and not a good flavor. Be sure to let them drain a bit and shake off excess water if possible.

The more vegetables the better
I omitted the celery and radishes from this recipe because I don’t love how they taste when they’re raw, but if you like them I would recommend adding them in. I think this salad would be great with a variety of vegetable and if I make it again I would add broccoli, peppers and carrots! I know they would be scrumptious in the salad, especially paired with the dressing.  

Alter the dressing
That statement seems strange, I know, but sometimes you must alter the dressing to your taste-buds. What seasonings I like, you may not like but that shouldn't deter you from trying out this recipe. I actually changed the dressing the original recipe called for and I love the way it turned out. Cilantro is such a potent herb and blends well in a dressing, which is why i chose this instead of basil. Do not get me wrong, I LOVE basil, however, I was a bad plant mom and killed my basil about a week after it was starting to thrive so...no basil for me. I really need to step up my “green thumb” game.

Please let me know if you have any comments or questions, I’d love to hear from you! We’re halfway through the week, we can do it! Happy eating!


print recipe


Chickpea Salad + Avocado Cilantro Dressing
Hearty chickpea salad with an avocado cilantro dressing!
Ingredients
  • 2 cans chickpeas
  • 1 cup red onion, chopped
  • 2 cups cucumber, peeled and chopped
  • 2 tomatoes, seeded and diced
  • 3 tbsps pepita seeds (or sunflower seeds)
  • Ingredients below are for the dressing
  • 1 avocado
  • 1/4 cup cilantro
  • 1 clove garlic
  • 3 tbsps olive oil
  • 1/4 cup low-fat yogurt
  • 2-3 tbsps water
  • salt and pepper to taste
Instructions
For the salad 1. Rinse chickpeas and add them to a large bowl. Add the chopped vegetables and top with the pepita seeds. Set aside.For the dressing 1. Add the avocado, cilantro, garlic, olive oil, yogurt, and just 2 tablespoons of water to a food processor or blender. Blend until the ingredients are well mixed. If dressing is too thick add water 1 tablespoon at a time until desired consistency is reached. 2. Season with salt and pepper to your liking. 3. Pour dressing over chickpea mixture. Refrigerate in air tight container.
Details
Prep time: Cook time: Total time: Yield: 6 servings

*Recipe adapted from Ceara's Kitchen

Monday, September 4, 2017

Everyday Makeup Staples

There are so many beauty products out there that promise you all kinds of things. Some are anti-aging, some create the look of less pores, others promise to brighten your skin or give you a flawless complexion. It can be difficult to know what you want and get what you need to make your makeup look best on you. Here are some of my everyday staples and tips for how to pick out yours.

Face Primer
Before using a primer I didn’t think it was a must have but trust me when I tell you it makes a world of difference. I’ve been using this Becca primer for quite some time and it has proven to be my favorite. I’ve talked about it in this post and showed you how to use it in this post. I like this primer because it gives a nice glow through my makeup while keeping my skin feeling hydrated. I use a primer because my makeup applies much smoother with this as a base layer. The Becca primer is a bit pricy so my bestie Leah recently suggested that I try the ELF primer. I decided to give it a try and purchased this one, which promises a poreless finish. My pores tend to stand out around the apples of my cheeks so I was excited, and skeptical, to try it out. I’ve been using this product for about a week and for the price, I think it’s a great buy. I like the way it feels on my face. It almost feels like the product makes your skin have a velvet film on it. I know that is an odd description but it really does feel that soft. As far as the promise for being poreless, it did do a good job hiding most of the pores but not all of them. My makeup blended so nicely on top of this and it wears well. There are different types of ELF primers. You can find them here. When looking for a primer think about why you’re reaching for one. Do you need longer lasting makeup, a healthy glow, or a hydrating base? Decide why you want one and then go out and look for one. It will save you hours of standing in the makeup aisle looking for something.

Medium Coverage Foundation
I like the look of a medium to light coverage foundation because it looks more natural. You can still pull off the no makeup, makeup look and cover any small blemishes that you might be wanting to hide. There are a few foundations I favor because I like the dewy or glowy look. So, if you like a more matte look do not get the same products as me because you will in fact be disappointed. The brands I use also offer different finishes so you can stick with the brand I like if you like. The first one is this L’Oreal foundation. I really like this product because a little goes a long way and it also comes in a matte finish, which I have used. It does have long wear but the only downside is the smell. My husband always says it smells like corn, which always makes me laugh but I really don’t think it has that smell. It does have a faint smell, but it has never bothered me. I purchased this Maybelline foundation recently and I love the way my skin looks with this product. It looks so flawless and blends in very easily with a foundation brush. When buying a foundation finding the perfect color can be difficult. I highly suggest that if you can open the bottle to see the color, test it on your jaw line. That way you can see how it blends in with your skin and see the color against your neck. It works!

Good Quality Blush
I used to buy drugstore blush like it was my job. I would pick up a new blush almost every month but it would never be what I wanted it to be. It would like great when I first put it on but by the end of the day it would be gone. I decided to invest in more good quality blushes, which can be pricey, but it is well worth it. I really like the pigment of Becca blush and I have been loving this Tarte blush, which I received as a sample but girl, you know I am going to be buying the full size when this runs out! It is so good! When looking for a blush, I think the key is to know what pigment looks best with your skin tone. I tend to stick with deeper pinks and rose colored blushes but there are brighter pinks and coral colors. These would not suit me, but if you have fairer skin they might work best in your favor. If you’re like yea that’s great to know but I still have no idea what color looks best with my skin, head into Sephora or Ulta. A makeup artist there will gladly help you and try different blushes to match your look.

Contour + Bronzer
Just hearing the word contour can be intimidating. I’m sure you’ve seen all those crazy videos where the women have all kinds of shapes and colors on their face before they blend it all in to create the perfect contour look. I promise you it is not that intimidating and it is definitely not that hard to do. I have a few products that I really like to work with when adding dimension to my face. I love this NYX contour pallette because it is a cream base. It is super easy to use and blends very easily on the skin. I like this powder bronzer because it can be used all over the skin and really provides a nice sun kissed glow. When using a powder the lines are much softer and not as defined. I’ve been layering these two products lately to create a tanned and contoured look. When finding a bronzer be sure to pick a color that isn’t too orange in hue. You want it to look as natural as possible and provide a nice shadow on your face to create more defined cheek bones.

Highlighter
When I do my makeup, it doesn’t look complete if I do not use highlighter. It creates such a polished look and I absolutely love the way it brightens the cheekbones. When choosing a highlighter I suggest not to buy anything that is too sparkly. I think there is a big difference between sparkly and shimmery. A sparkle based highlighter will leave lots of fall out without putting much color onto your face. A shimmer based highlight will stick where you want it and give glow to your face. My personal favorites are this and this Becca highlight, and this Maybelline glow stick. Sometimes, I even layer the cream stick highlight with the powder highlight for some extra blinding glow. When choosing a highlighter it’s important to think about your skin color. I tend to favor highlighters that have a more golden undertone but there are others that have a more pink or white undertone. On me, they do not work but if you have fair skin they should be your go to.  

Mascara + Primer
I started to use a lash primer about 6 months ago. It is not required to have beautiful lashes but ladies, it really does make your lashes much longer and fuller. I use this primer and fill in my brows while I let it dry a bit before applying this mascara. I’ve found that if I give the primer some time to dry, it gets a little tacky and the mascara sticks a lot better. I suggest this combo to everyone and anyone who asks. They are great products at a really good price.

Chapstick
This is an absolute necessity in my opinion. I probably have a Blistex chapstick in every room in my house and I even house one in my desk at work. Let me digress about a funny story I have about chapstick. When I first started teaching I was not as smart as I am now and therefore did not have chapstick in my desk at work. One particular fall day my lips were dying. They literally felt like they were cracking off and I thought they may never recover. Being a new teacher I worked many late hours and found myself at work well into 5 o’clock. My sweet Aunt lives so close to my school, walking distance in fact, and I had told her how my lips were crumbling because I didn’t have chapstick. To my surprise, at around 5 she showed up outside of my classroom window with a brand new chapstick. She seriously saved my lips that day, and from then on, I have not been without my chapstick. Is that story a bit dramatic? Yes. But is it true? Absolutely! Get yourself some chapstick to keep your lips moist and crack free!

Well that ended up being longer than I expected it to be. My poor husband asked me to make dinner about an hour ago, oops! I think this is going to be really helpful to you as you build your makeup collection and get the things that enhance your natural beauty. Please let me know if you have any questions, I am always happy to help! Stay beautiful!

Friday, September 1, 2017

Friday Favorites

I thought it would be fun to share some of my favorite things on Fridays, enter Friday Favorites. We can have a little girl talk and I can share things I’m loving from makeup to food and everything in between. Let’s get to it!

 
Choker necklace
I’ve been loving this choker necklace by Lauren Conrad. It is the perfect length where it doesn’t feel like it’s choking you but can still be used to layer with. I took off the pendant it came with because I wanted something simple. I have been wearing it with everything and I can’t wait to get some necklaces to layer it with. I have my eye on this one. I love pineapples!


White tee
This white tee from Target is by far the best thing I’ve purchased this summer. I wear it at least once a week and it is so versatile. I’ve worn it tucked into jean shorts, slouchy with leggings, and tied on the side with pants. It is such a staple and I’m kicking myself for not getting two. Luckily it’s currently on sale - restock!!


Iced coconut milk mocha macchiato
Try saying that one three times fast. LOL. If you haven’t tried Starbucks coconut milk drinks you really are missing out. You guys know I am kind of obsessed with coconut milk so naturally I would be loving this macchiato. Lattes tend to upset my stomach because of the milk, but not this one! I can’t wait for pumpkin spice to come back so I can try it with that - yum! I hope the coconut milk is here to stay because now that school is starting back up I need all the caffeine I can get.


Essential oils
My aunt introduced me to essential oils and I can honestly say they have changed my life. That’s a pretty big statement but if you use essential oils than you totally know what I mean. Prior to using essential oils I was taking ibuprofen twice a day when it was that time of the month. For about 7 days, I would pop those things like candy because my cramps and headaches were so unbelievably bad. That’s 28 ibuprofen, do you know what that stuff can do to your liver?! Since using the oils, I almost rarely take it. I dab some lavender or clary calm on my temples, rub some deep blue on my stomach and back, and use my monthly women’s blend when I’m feeling extra moody. I also use them for stomach aches, headaches, and even acne and yes, they really do work. These oils are amazing.

What are some of the things you’re loving lately? I’d love to hear from you!